I've been lurking here for about five months and figured this was a good reason to finally join up and make a post. Below is a copy and paste from my post on reddit's /r/socalhiking where tekewin (who posts there as slippery) first mentioned this forum and route. So thanks to him and all of you for the great resource that this forum is!
-----------------------
TLDR Trip report:
Big loop that goes over Pine, Dawson, Baldy, West Baldy, Iron, down to Heaton Flat, Rattlesnake, South Hawkins, Hawkins, Throop, Burnham, Baden-Powell. Primary goal just to finish, secondary to finish under 24 hours. Finished, but took almost 28 hours. Had support for food and water. Had a good time.
Gallery (edit: looks like I can't post a link, find my post of the same title on /r/socalhiking and follow the link from there)
Inspiration and prep
After hiking the Cactus to Clouds route up San Jacinto last November and wanting a bigger challenge, I had been planning on doing a 50mi out and back from Snow Creek Village to Jacinto. About five months ago I saw a post from /u/slippery mentioning the “San Gabriel Death March” route dreamed up by members of the EisPiraten.com hiking forum:
death-march-t1173.html
My first reaction to looking at the route was “nope!” but it tickled the back of my mind until I decided to give it a shot because it was a more interesting and harder route than my previous plan, as well as being a loop instead of an out and back. There was some discussion about different exact routes, but the one that made the most sense to me and seems fairly definitive was nearly completed by forum member Sean and gave me some good ideas for my attempt:
surviving-a-death-march-attempt-t5806.html
To prepare for the attempt I began upping my distances and elevation gain on training hikes, as well as scouting the route. I have spent plenty of time in those mountains, but still had a few sections to check out so that I could know what to expect when I connected them all in a single hike. Between previous hikes and specific scouting trips I did every section of the route as an out and back at least once except the very short bit of the PCT between Throop and Burnham. I also wanted to record GPS tracks to help plan and so I could use those to follow if needed since a good chunk of the route would be happening in the dark. I have posted about some of my previous scouting/training hikes, but didn’t want to say what the ultimate goal was in case it fell through or I flamed out embarrassingly early in the route! The original goal was to do it in late September, but a minor injury this summer and being busy with other less fun parts of life kept me from doing any significant training for almost two months. Early November was about as late as I could push it without gambling too much on weather, but also meant less daylight. I still wanted more time to train, but needed to just set a date and go for it. I didn’t want to wait until spring and lose the training I had already put in waiting for the snow to melt.
Route planning
I decided on a clockwise route starting from Inspiration Point. There are a confusing number of places with this creative name, I’m referring to the spot where the PCT crosses the Angeles Crest Highway and the Blue Ridge Truck Trail starts up. I considered starting from Guffy Campground a little further east, but didn’t want to risk the gate being locked or have to worry about waking people up starting and (hopefully!) finishing at odd hours of the night. I chose to go clockwise because based on the last time I did the San Antonio Ridge Traverse I found it easier and safer to go east to west scrambling up Gunsight Notch and the rest of that section than to go down it. It also made sense to go clockwise to go up the off trail section between Rattlesnake Peak and South Hawkins instead of risking accidentally taking the wrong ridge going down, which happened to another person who attempted the route. I chose to start around 1am with the goal of reaching West Baldy right at sunrise to maximize daylight during the two most dangerous (Gunsight Notch) and difficult (Rattlesnake to South Hawkins) sections.
Support
Because others had attempted the route unassisted that was my original goal as well, with a plan to cache water in a few places and carry all my food so I didn’t have to worry about animals getting into it. Also, I didn’t want to ask my wife to spend 30+ hours driving around and supporting me. When I told her my plan, she made the compelling argument that attempting something this difficult for the first time unsupported was stupid, and offered to help. Great! When I told my dad about my plans he quickly offered to fly out and help as well since he has done similar challenges before, so it turned into a nice visit as well as a way to benefit from his experience. Since I was no longer doing it totally unsupported purist style, I figured I might as well go all out and copy some of the things I had seen from ultra marathon events I had seen videos of and read about. As a result, the food I carried or had at my support stops included pizza, bacon, peanut butter cups, chocolate covered peppermint joe-joe cookies, sports drinks, and fresh donuts. I also carried my usual Clif Bars and Shot Bloks.
I carried my InReach satellite messenger and sent an “everything is good!” message with my GPS location hourly. This way my support could monitor my progress in the areas they had cell service, and I could communicate with them if anything else came up, such as having to bail out to one of the predetermined spots if I was unable to make it to the normal support spots due to injury or other issues.
Section 1: Inspiration Point to North Backbone
We arrived at the parking lot at 1am and I started actually hiking at 1:20am. This section is a nice warmup, about 7 miles starting at 7,333’ and continuing to 8,200’. This was all pretty uneventful and I tried to maintain a good pace, reaching the junction to the North Backbone in a little under two hours. The only question along the way was if I would decide to go over the proper summit of Wright Mountain. I decided against it since it’s basically a flat hill from this side and doesn’t have a direct trail over it and back where I needed to go. Because it was dark I didn’t want to spend time wandering around the summit and then have to backtrack. My comprise was at least staying on the PCT instead of walking the Blue Ridge Truck trail, which is a little longer, gets slightly closer to the summit, and I’d rather be on trail than a road anyway.
Section 2: North Backbone to West Baldy
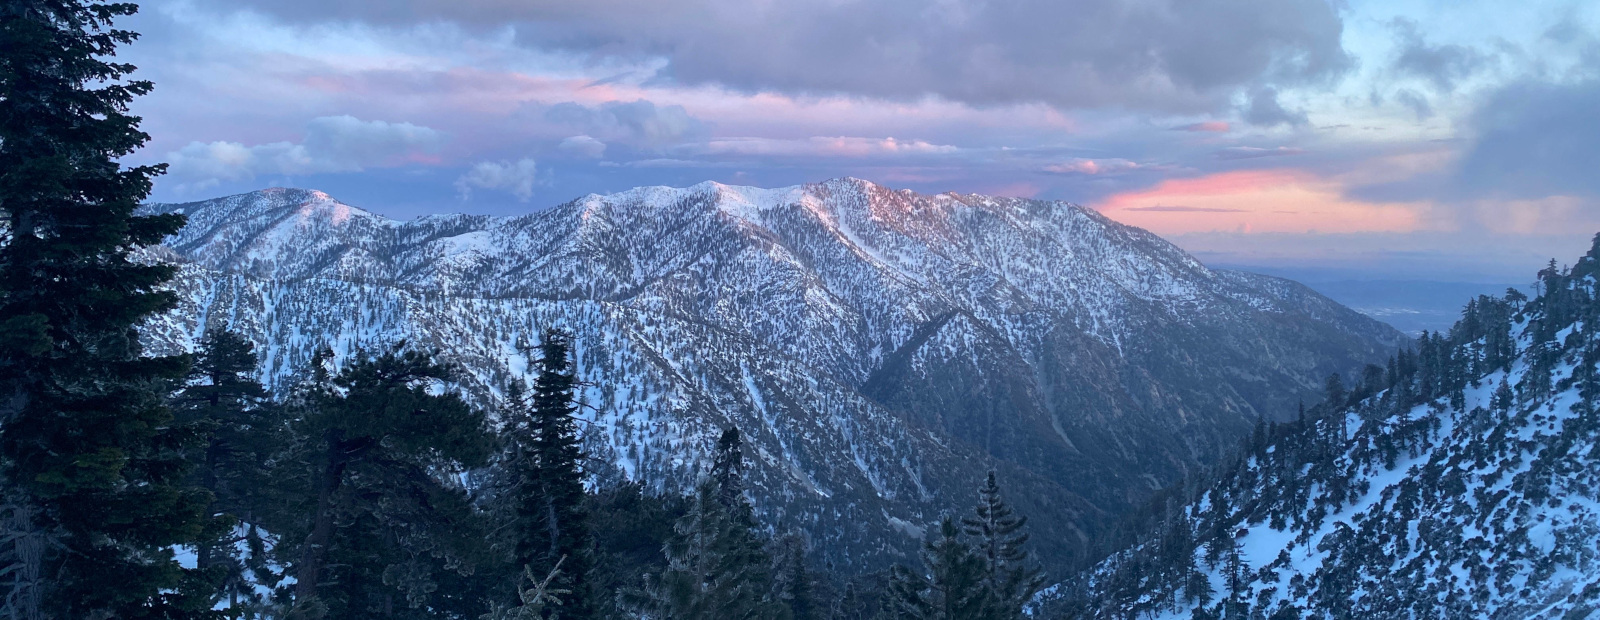
I cut down the small slope between the PCT and North Backbone trail just after 3am. The first part to Pine does have some fairly steep and narrow sections along the ridge, as well as some loose rock and a couple places where it helps to use your hands, but I have done this part enough times that I felt comfortable doing it by headlamp. The actual summit of Pine is slightly off the main trail, so I cut across some vegetation and fallen logs until my GPS showed me at the actual summit, then cut directly south until I rejoined the trail. Dawson isn’t much of a summit and the mail trail goes below it, so at what seemed like a reasonable point I left the trail to follow the ridgeline up to the high point, then angled down to rejoin the trail to the saddle for the climb up to Baldy. The wind picked up about halfway up and my fingers started getting pretty cold, but it didn’t last long and that was the extent of my weather issues. I reached the summit of Baldy (the hig point of the route at 10,064’) right at the start of sunrise, which was quite scenic. I expected to see some tents at the summit since it was a holiday weekend, but didn’t see anyone. I reached West Baldy within a minute of my goal time, so I was feeling pretty good.
Section 3: West Baldy to Iron Mountain
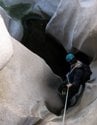
The first half of the 2,000’ descent down West Baldy to where the San Antonio Ridge levels out is pretty easy to follow, but also rather rocky. As you get further down the route becomes less apparent and the trees start filling in. There are multiple footpaths and rock markers that can lead in slightly different directions, though they eventually converge at the bottom. Once it starts to level out, you get the first taste of vegetation that will slow things down. On a previous training hike I had actually done a little pruning along the ridge because it slowed me down and scratched me up so much the first time I did the San Antonio Ridge Traverse, but it’s so long I only made a small dent in it. Once I passed where I stopped working, I just charged directly though the vegetation instead of spending time trying to find ways around it, with long pants I only got moderately scratched up. Gunsight Notch and the rest of the scrambling section just past it are a lot of fun, but also the most dangerous section of the whole route. It’s sloped and has big enough holds that it isn’t difficult as long as you can identify what rock is solid and what is loose, but you definitely don’t want to fall here. After a little more scrambling and some cool narrow sections, it widens out and after going up a short slope you emerge right at the summit of Iron (7,936’). The view from the summit is fantastic, and gives you a good overview of most of the peaks and ridges the route goes over.
Section 4: Iron to Heaton Flat/Shoemaker Canyon Road
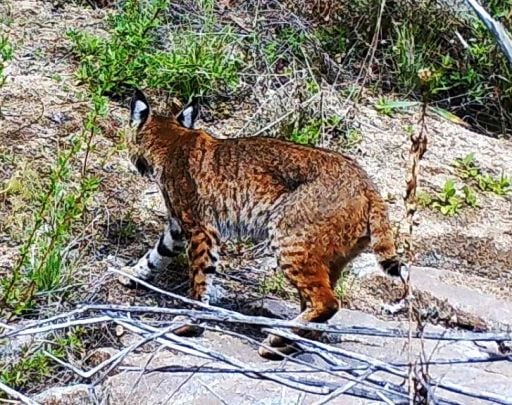
I hadn’t really been watching the time in the last section, so when I finally paid attention to it on the summit of Iron I realized I was pretty far behind my goal time. I wanted to do the 6,000’ descent from Iron to Heaton Flat as quickly as possible to try and make some of that up. The upper third to half of the trail down is very steep, with quite a few loose sections, and is pretty overgrown. As a result, you can only go so fast without risking a fall. The second half and the trail is less steep and in better shape, so I jogged the last four miles. At this point I was nearly two hours behind my originally planned arrival at the first support stop. There is no cell service at Heaton Flat so I didn’t want my wife and dad to get too worried about me and potentially drive back to Azusa for a signal to see where I was, possibly making us miss each other. On the way down I saw my first other hikers, a group of four on their way up. While jogging I also caught my toe on a rock and tripped, but luckily managed to catch myself with one hand and pushed back up without even stopping. It would have been better not to trip in the first place, but still felt pretty slick (aka lucky). I ran out of water on my way down as well, which I wasn’t expecting. I started with 5L back at Inspiration Point, which usually lasts me around 25mi, but ran out at 18.5mi. It was warming up, but luckily basically all downhill, so it wasn’t a big problem. Being a holiday weekend, Heaton Flat was packed, which is why I had my wife and dad park at the Shoemaker Canyon Road gate on the other side of the East Fork. I jumped over the route’s low point of East Fork at 1,850’ and hoped I didn’t slip and fall in front of the people fishing just downstream. From there it was a short scramble up the other side though heavy vegetation and then a very loose slope, emerging just before the gate where my excellent support team was waiting.
At 22mi I was already 2 hours behind my target time and still had the hardest and longest climb ahead. I realized a sub-24 hour time wasn’t going to happen, so I decided to back off a little and just focus on finishing while still having fun and reducing my chance of injury. As a result, a planned 15 minute support stop turned into a nice 40 minute break, with nourishing pizza, a maple bar, cookies, gatorade, and a protein drink. I also put another 5L of water in my pack.
Section 5: Shoemaker to South Hawkins
After my leisurely resupply, my wife and dad walked the first mile and a half up the road with me, then turned back in order to drive to Dawson Saddle and hike in to the next supply stop. I continued on at a decent pace and still felt pretty good, though I wasn’t trying to hurry. The hike to Rattlesnake is one of my favorite sections of the route. It’s a long climb, but the trail is in good shape and follows the top of the ridge pretty much the whole way, giving great views in all directions. It’s also not a very popular hike, so you rarely see other people. This being a weekend, I did see my second and only other group of eight or so hikers on their way down from Rattlesnake as I was going up. When I told them what I was up to they seemed impressed and slightly concerned. They were somewhat reassured that I was carrying an InReach in case I got into trouble. At this point I remembered that I had forgotten to put the bacon prepared for this hike in my pack at the last support stop, so I used my InReach to message my wife to bring it to the next one. Yay technology! The rest of the way up to Rattlesnake (5,814’) was pleasant and uneventful, I had spent a couple hours pruning overgrown sections of the last mile to the summit on a previous training hike, which also helped.
The second half of this section up to South Hawkins is the most demanding part of the whole route, and starts with a rather unpleasant drop of a few hundred feet down to the ridge. I tried a different route than the last time I did this section, but I’m pretty convinced there is no good way to do it without backtracking and cutting across well below the summit. It’s steep, with soft, loose soil, rocks here and there, and scattered vegetation. There are multiple sets of tracks visible because the ground is so soft, but none I found work particularly well, you just have to struggle through it and try not to slip as you cross the steep slope towards the ridge. There are two minor peaks along this first section with a faint but relatively easy to follow use trail. I was still in this part as the sun was setting, I had originally hoped to be at or close to South Hawkins by this point! 26 miles in, this part is tough. It’s a long steady climb up with no trail, luckily the ground is firm and easy to walk on for the most part. The vegetation isn’t as thick as San Antonio Ridge, but requires constant zig zagging around thorn bushes, often just squeezing between them, and occasionally hitting a solid wall of brush and having to find a way around it. The combination of terrain, vegetation, and fatigue, plus doing all this in the dark, kept my speed to only about one mile an hour. It seemed to go on forever, but finally after about eight hours since I left Shoemaker Canyon Road I came over the final rise and saw the dirt road, one small structure, and old foundations that marked the summit of South Hawkins at 7,772’.
Section 6: South Hawkins to Vincent Gap
Finally back on trail for the remainder of the route! The Hawkins ridge trail seems to have had a good bit of work done on it since I was last there, and was in good shape. My feet were sore, but my legs still felt pretty good on the gradual climb over about two miles. I met my wife and dad at the junction with the PCT, they had hiked in a couple miles from Dawson Saddle and set up sleeping bags in the middle of the trail so there was no chance we would miss each other. The maple bar they brought me was the best tasting maple bar I’ve ever had after that long climb! I was also very happy to get the requested bacon and refill my water so I no longer had to conserve and risk running out again. After a short break the three of us hiked together for a bit and tagged Hawkins and Throop before they forked off back towards Dawson Saddle to drive to the next stop. The trail then continues gradually up, with a little wandering around to try and find the minor path off the PCT to the Burnham summit, then reaching the final peak of Baden-Powell at 9,383’. I also hit the 24 hour mark around here with almost 10 miles to go. One of my multiple blisters got particularly painful around Baden-Powell, so I stopped on the monument to quickly rebandage one toe before the long descent. The switchbacks down to Vincent Gap at 6,600’ seemed to go very slowly, which wasn’t helped by my sore big toes. At Vincent Gap I woke up my support team sleeping in the car and ate a quick snack of a savory pastry and handful of cashews, then crossed the 2 for the final section.
Section 7: Vincent Gap to Inspiration Point/Finish
The final section is 5.4 miles and gains a few hundred feet at the start before becoming pretty level for the last few miles. This section is pretty uneventful, though I almost took a wrong turn to Jackson Flat. I chose Inspiration Point partly so I’d have an easy last few miles on the back end so even if I was in bad shape I could hopefully limp along the finish. Aside from my feet I actually felt pretty good, and since I was well past 24 hours at this point my new goal became just to beat the sunrise so I wouldn’t have two of them during the hike. For the last half of this nearly section I was able to maintain about three miles an hour, and reached the sign just after 5am, about 20 minutes before sunrise. I had celebratory beer in the car, but was too tired to bother with it, and was happy to sleep on the drive home. Huge thanks to the excellent support from my wife and dad!
Final stats: 47.4mi, 27 hours and 48 minutes, 16,660ft elevation gain/loss.
24 hour goal
The original goal was to finish under 24 hours, so I was about four hours past that point. Once I was behind schedule at the halfway point it was kind of nice to decide not to worry about time and take a little of the pressure off, but of course I’m still thinking about how to get under 24 hours anyway. I’m pretty sure I could shave off almost two hours if I hadn’t decided to back off a bit. I would have kept my supply stops much shorter, and could have pushed a little harder in places. If I could eventually figure out a foot care routine that works for me and avoid the blisters, I’m sure I could gain at least 30 minutes. I tried sock liners for the first time along this hike, but that didn’t seem to make a difference. Beyond that it just comes down to better fitness. I did run for a few miles of the route down from Iron, but if I was able to run at least the easier sections of the PCT that would also help a fair bit. It would be hard to go much faster along the San Antonio Ridge due to terrain and vegetation, but better base fitness for the climb between Shoemaker and South Hawkins would certainly help. Getting to that section a little earlier to do it all in daylight would also allow for better route finding up the off trail section, which would speed things up a bit.
If I decide to give it a shot and am diligent about training, I think I would have a decent chance at caching supplies and doing it unsupported this spring in under 24 hours, but for now I’m going to take a couple weeks off!
San Gabriel Death March (long trip report and photos in comments)

-
headsizeburrito

- Posts: 279
- Joined: Wed Nov 15, 2017 1:18 pm
Thanks!
My current to do list has some good hikes, but most aren't quite this long.
San Gabriels: N and SW approaches to Iron, Heaton to Baldy and back, Triplet Rocks, Vincent Gap to Ross to Point of Inaccessibility (and then maybe doing those points from East Fork), Sean's Cucamonga 50 challenge.
San Bernardinos: Yucaipa Ridge Traverse, a proper 9 Peak Traverse since I've done Angelus Oaks to San Gorgonio as an out and back, but haven't actually tagged each summit along the way in one go.
Jacinto: C2C2C via two off trail routes, going up Leatherneck Ridge and the Snow Creek route, then probably going down via Fuller Ridge/PCT to Snow Creek Village.
I'm open to suggestions!
-
Uncle Rico

- Posts: 1466
- Joined: Thu Mar 20, 2008 7:48 pm
OMG you did it! Congrats! Super impressive.

Awesome. Congrats on completing the route. That, in itself, is an amazing accomplishment and shows great planning. The foot care issue can be solved quite easily. I solved it by using hiking sandals for some sections. You lose time switching footwear, but you save time not having to deal with blisters. Also, you could tape up your feet like football players do before games. There are other solutions too. It doesn't sound like you acclimatized beforehand. That could also help shave off some time.
-
headsizeburrito
- Posts: 279
- Joined: Wed Nov 15, 2017 1:18 pm
I've thought about giving the sandal thing a try, but I'd like to avoid carrying a second set of footwear if possible. I already tape the hell out of my feet before longer hikes (full heel plus big toe, second toe, and little toe) and it helps a little, but not enough. Today I picked up some toe socks, so I'll if that helps, as well as trying to adjust my lacing and maybe try different and/or half size larger shoes.
-
Enchilada Sauce

- Posts: 2
- Joined: Sun Nov 19, 2017 3:34 pm
He's on Instabook and Facegram now. I'm not sure where he lives at the moment, but he's still rock climbing and shitposting across the webverse.dima wrote: Yeah. Did Taco end up moving, or what happened with him?
I thought only bored teenagers use thoseEnchilada Sauce wrote:He's on Instabook and Facegram now. I'm not sure where he lives at the moment, but he's still rock climbing and shitposting across the webverse.dima wrote: Yeah. Did Taco end up moving, or what happened with him?
Oh, that death march is so easy-schmeezy...says me complaining about the 50 stairs down to the beach hehe.
But seriously, I dont think there is anything with as much scenic sections that could be designed.
Besides the usual suspects of big loops, there is a Tujunga big big loop that hasnt had any attention.
Start at Highway 2 and tag Joesphine, Strawberry. and Lawlor, then to Strawberry Meadows and down to Upper Big T road. And then to Gleason and then all the way down to the Big T road and then up to Lukens and then back to your car.
Not something I would do lol.
-
headsizeburrito
- Posts: 279
- Joined: Wed Nov 15, 2017 1:18 pm
Pretty amazing how much of it they ran and how they managed really fast times on the roughest sections off trail.headsizeburrito wrote: A group finished the route in 22h47m, trip report posted here: San Gabriel death march, sub 24

I think it is amazing to complete this hike.headsizeburrito wrote: A group finished the route in 22h47m, trip report posted here: San Gabriel death march, sub 24
I'm commenting only to mention that I remember this hike was first mentioned back in 2007 (at least by my recollection) on Richard Piotrowski's old old now defunct Southern California Mountains Forum www.mt-whitney.info (which, if I recall correctly, preceded this forum by a few years and had gone defunct soon after Taco and Travis started this board). It was called the Big San Gabriel Loop and then @lilbitmo picked up on it here death-march-t1173.html and called it the Death March.
Also...what's with the guy in the comments whining about the "Death March"? Jeez, go home to your safe space.
-
headsizeburrito
- Posts: 279
- Joined: Wed Nov 15, 2017 1:18 pm
As I said at the time, any semi competent ultra runner with some mountain skills would easily beat my time. That said, it's isn't a race so I'm just glad to see a few more people do it so I enjoy some trip reports! Finishing it in one go is a cool accomplishment regardless of time.
I almost replied to the guy about the name, but decided it wasn't worth the effort. Yes the term has a dark history, but language evolves and it's not rare for it to be used somewhat tongue in cheek for various difficult things.
I almost replied to the guy about the name, but decided it wasn't worth the effort. Yes the term has a dark history, but language evolves and it's not rare for it to be used somewhat tongue in cheek for various difficult things.
-
Uncle Rico
- Posts: 1466
- Joined: Thu Mar 20, 2008 7:48 pm
On the bright side, at least the route wasn't named the San Gabriel Trail of Tears. ?
Hard to call it a "death march" in any figurative sense with two car caches. The spirit of the challenge appears to be waning. Obviously the Big Loop is extremely tough even with support. But I still believe it can be done without support in one day.
-
headsizeburrito
- Posts: 279
- Joined: Wed Nov 15, 2017 1:18 pm
Well I suppose there aren't exactly bylaws for the challenge, and supported and unsupported times have always been separated in more formalized bike hiking challenges (FKTs on big thru hikes etc). Then you have to decide if caching your own supplies ahead of time is allowed or not (self supported vs fully unsupported). I'm pretty confident I could do it unsupported now, but I was certainly happy to have the help the first time since I'd never tried something like that before! There are certainly plenty of trail ultra marathon types who could do it if they decided to try. Either way it's cool to see more people giving it a shot because I like reading the trip reports!
I think you and Dima could do it fully unsupported. But it would have to be an ideal time of year with good weather conditions. A steak dinner to the first person from this forum who does it unsupported without caches!headsizeburrito wrote:Then you have to decide if caching your own supplies ahead of time is allowed or not (self supported vs fully unsupported).
-
davidwiese

- Posts: 92
- Joined: Mon Jul 30, 2018 4:00 pm
8L of water and food for the whole day should only be about ~20 pounds. 
Personally I'd just re-supply once at a car.
Personally I'd just re-supply once at a car.